企业实战 LNMP 高性能服务器
LNMP WEB 架构中,Nginx 为一款高性能 Web 服务器,本身是不能处理 PHP 的,当接收到客户端浏览器发送 HTTP Request 请求时,Nginx 服务器响应并处理 web 请求,静态资源 CSS、图片、视频、TXT 等静态文件请求,Nginx 服务器可以直接处理并回应。
但是 PHP 动态页面请求 Nginx 不能直接处理,Nginx 服务器会将 PHP 网页脚本通过接口传输协议(网关协议)PHP-FCGI(Fast-CGI)传输给 PHP-FPM(进程管理程序),PHP-FPM 不做处理,然后 PHP-FPM 调用 PHP 解析器进程,PHP 解析器解析 PHP 脚本信息。PHP 解析器进程可以启动多个,可以实现多进行并发执行。
PHP 解释器将解析后的脚本返回到 PHP-FPM,PHP-FPM 再通过 Fast-CGI 的形式将脚本信息传送给 Nginx,Nginx 服务器再通过 Http Response 的形式传送给浏览器,浏览器再进行解析与渲染然后进行呈现。
1. 安装 mysql
1.1 预编译
cd /usr/src
wget http://mirrors.163.com/mysql/Downloads/MySQL-5.5/mysql-5.5.60.tar.gz
tar xf mysql-5.5.60.tar.gz
cd mysql-5.5.60/
yum install gcc ncurses-devel libaio bison gcc-c++  git cmake  ncurses-devel ncurses -y

cmake  .  -DCMAKE_INSTALL_PREFIX=/usr/local/mysql55/ \
-DMYSQL_UNIX_ADDR=/tmp/mysql.sock \
-DMYSQL_DATADIR=/data/mysql \
-DSYSCONFDIR=/usr/local/mysql55/ \
-DMYSQL_USER=mysql \
-DMYSQL_TCP_PORT=3306 \
-DWITH_XTRADB_STORAGE_ENGINE=1 \
-DWITH_INNOBASE_STORAGE_ENGINE=1 \
-DWITH_PARTITION_STORAGE_ENGINE=1 \
-DWITH_BLACKHOLE_STORAGE_ENGINE=1 \
-DWITH_MYISAM_STORAGE_ENGINE=1 \
-DWITH_READLINE=1 \
-DENABLED_LOCAL_INFILE=1 \
-DWITH_EXTRA_CHARSETS=1 \
-DDEFAULT_CHARSET=utf8 \
-DDEFAULT_COLLATION=utf8_general_ci \
-DEXTRA_CHARSETS=all \
-DWITH_BIG_TABLES=1 \
-DWITH_DEBUG=0
1.2 编译/安装
make  && make install

cp support-files/my-large.cnf /usr/local/mysql55/my.cnf
cp support-files/mysql.server /etc/init.d/mysqld
chmod +x  /etc/init.d/mysqld
mkdir -p /data/mysql
useradd -s /sbin/nologin mysql
chown -R mysql. /data/mysql
/usr/local/mysql55/scripts/mysql_install_db  --user=mysql --datadir=/data/mysql --basedir=/usr/local/mysql55
/etc/init.d/mysqld start
1.3 添加系统服务
# 加入service服务:
chkconfig --add mysqld
chkconfig --level 35 mysqld on
2. 安装 nginx
# 安装编译环境
yum install gcc gcc-c++ pcre pcre-devel zlib zlib-devel openssl openssl-devel -y

# 下载源码:
wget http://nginx.org/download/nginx-1.16.0.tar.gz

#  解压:
tar xf nginx-1.16.0.tar.gz
cd nginx-1.16.0/

# 预编译:
./configure --prefix=/usr/local/nginx --with-http_stub_status_module

# 编译/安装
make && make install

# 修改nginx进程用户为nginx后查看
grep "^user" /usr/local/nginx/conf/nginx.conf
user  nginx;

# 启动nginx:
/usr/local/nginx/sbin/nginx
3. 安装 php
# 安装依赖:
yum -y install gd curl curl-devel libjpeg libjpeg-devel libpng libpng-devel freetype freetype-devel libxml2 libxml2-devel
# 解压包:
tar xf php-5.6.8.tar.bz2
cd php-5.6.8
# 预编译
 ./configure --prefix=/usr/local/php  \
 --enable-fpm \
 --enable-debug \
 --with-gd \
 --with-jpeg-dir \
 --with-png-dir \
 --with-freetype-dir \
 --enable-mbstring \
 --with-curl \
 --with-mysql=mysqlnd \
 --with-mysqli=mysqlnd \
 --with-pdo-mysql=mysqlnd \
 --with-config-file-path=/usr/local/php/etc \
 --with-zlib-dir
 # 编译/安装
 make  && make install

cp php.ini-development  /usr/local/php/etc/php.ini
cp /usr/local/php/etc/php-fpm.conf.default /usr/local/php/etc/php-fpm.conf
cp sapi/fpm/init.d.php-fpm /etc/init.d/php-fpm
chmod +x /etc/init.d/php-fpm
# 修改php-fpm的用户为nginx:
[root@node4 html]# egrep "^(user|group)" /usr/local/php/etc/php-fpm.conf
user = nginx
group = nginx

# 启动php-fpm:
/etc/init.d/php-fpm start
4. 上传 wordpress 网站代码
# 解压包到nginx发布目录:
tar xf wordpress-4.9.4-zh_CN.tar.gz  -C /usr/local/nginx/html/
chown nginx.  -R /usr/local/nginx/html/wordpress/
5. 创建 wordpress 虚拟主机
# 指定应用的虚拟主机目录(主配置文件http指令块下添加):
include vhost/*.conf;
# 创建虚拟主机目录:
mkdir -p /usr/local/nginx/conf/vhost
# 创建虚拟主机配置文件:
vim /usr/local/nginx/conf/vhost/blog.wordpress.com.conf
server {
        listen       80;
        server_name blog.wordpress.com;
        #charset koi8-r;
        access_log  logs/wordpress.access.log;
        location / {
            root   html/wordpress;
            index  index.php  index.html index.htm;
        }
        #error_page  404              /404.html;
        # redirect server error pages to the static page /50x.html
        #
        error_page   500 502 503 504  /50x.html;
        location = /50x.html {
                root   html;
        }
        location ~ \.php$ {
            root           html/wordpress;
            fastcgi_pass   127.0.0.1:9000;
            fastcgi_index  index.php;
            fastcgi_param  SCRIPT_FILENAME  $document_root$fastcgi_script_name;
            include        fastcgi_params;
        }
}
6. 创建数据库
# 启动数据库服务:
/etc/init.d/mysqld start
# 进入数据库创建数据库,并授权:
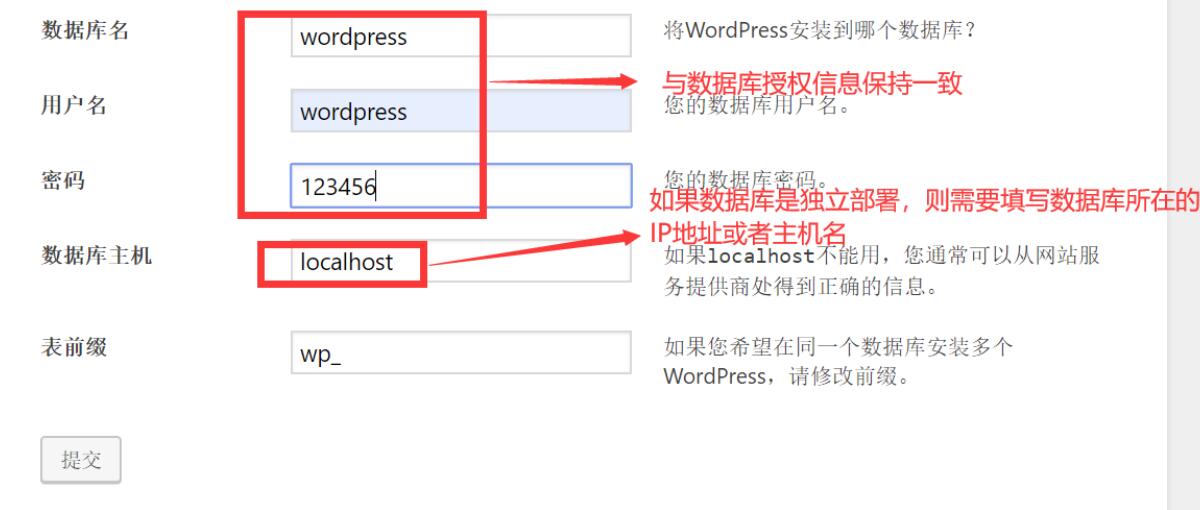
MariaDB [(none)]> create database wordpress charset utf8;
Query OK, 1 row affected (0.00 sec)

MariaDB [(none)]> grant all on wordpress.* to "wordpress"@localhost identified by "123456";
Query OK, 0 rows affected (0.10 sec)

MariaDB [(none)]> flush privileges;
Query OK, 0 rows affected (0.00 sec)
7. 访问 wordpress
blog.wordpress.com
在物理机做好 hosts 解析192.168.75.134 blog.wordpress.com bbs.discuz.com


8. 创建 discuz 虚拟主机配置文件
# 切换到vhost目录:
cp blog.wordpress.com.conf  bbs.discuz.com.conf
# 修改域名和路径:
server {
        listen       80;
        server_name bbs.discuz.com;
        #charset koi8-r;
        access_log  logs/discuz.access.log  main;
        location / {
            root   html/discuz/upload;
            index  index.php  index.html index.htm;
        }
        #error_page  404              /404.html;
        # redirect server error pages to the static page /50x.html
        #
        error_page   500 502 503 504  /50x.html;
        location = /50x.html {
                root   html;
        }

        location ~ \.php$ {
            root           html/discuz/upload;
            fastcgi_pass   127.0.0.1:9000;
            fastcgi_index  index.php;
            fastcgi_param  SCRIPT_FILENAME  $document_root$fastcgi_script_name;
                 include        fastcgi_params;
        }
}
9. 上传网站代码
# 解压:
unzip Discuz_X3.1_SC_UTF8.zip  -d /usr/local/nginx/html/discuz/
# 授权:
chown  nginx. -R /usr/local/nginx/html/discuz/
10. 创建数据库
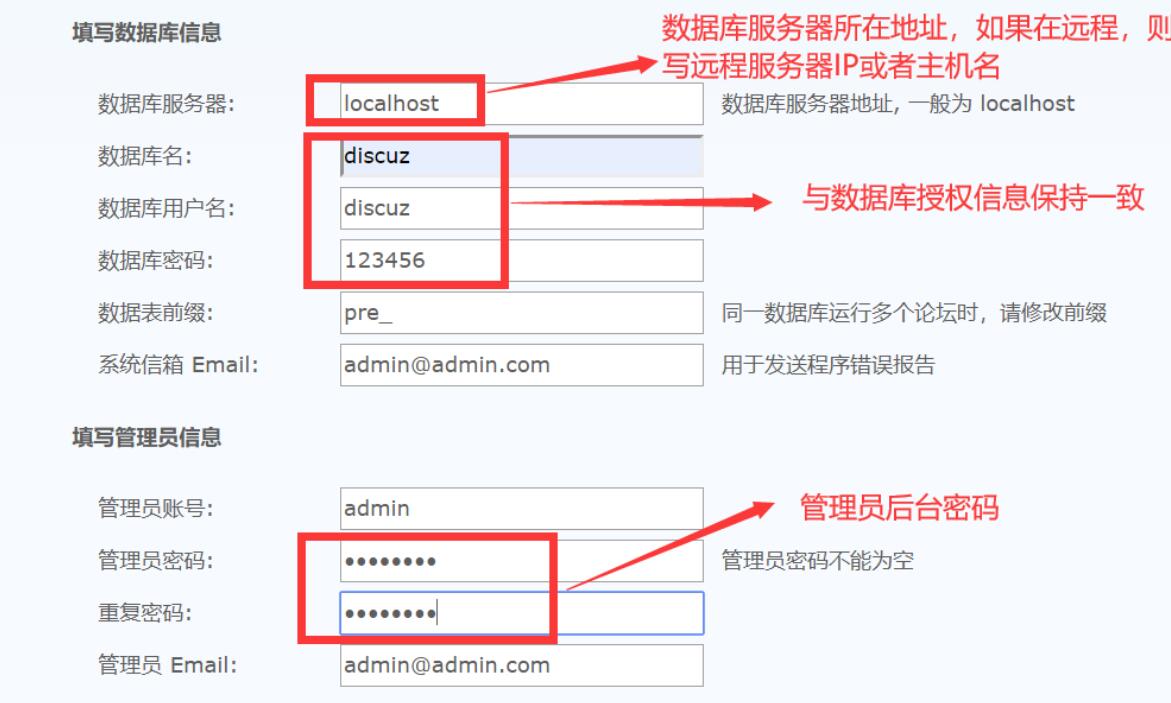
MariaDB [(none)]> create database discuz  charset utf8;
Query OK, 1 row affected (0.00 sec)

MariaDB [(none)]> grant all on discuz.* to "discuz"@"%" identified by "123456";
Query OK, 0 rows affected (0.00 sec)

MariaDB [(none)]> flush privileges;
Query OK, 0 rows affected (0.00 sec)
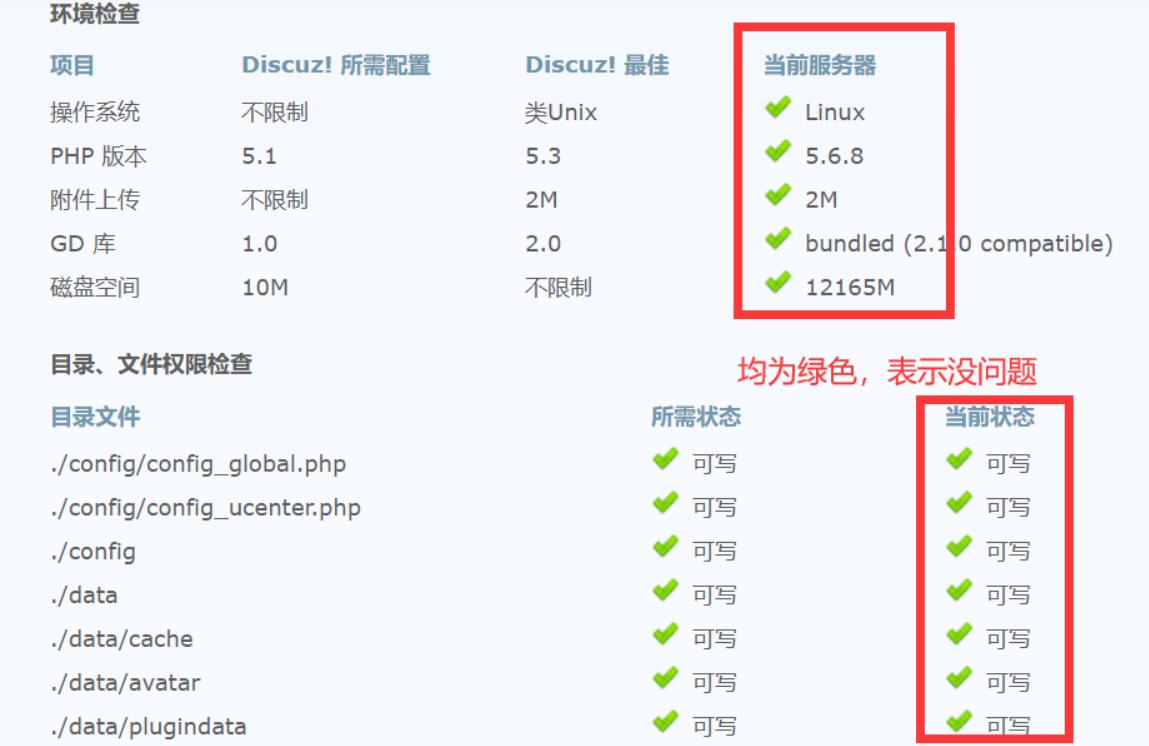
11. 访问 discuz
bbs.discuz.com


